Making a Smart Sandbox Request
Using Smart Sandbox
Smart Sandbox is a full testing environment. It returns a validated response from the database based on the request body content.
- Smart Sandbox maintains the state of the data, i.e. new invoices inputs, etc.
- It requires message signing, encryption and Base64 encoding of the request and response payload.
- It uses the Client Credentials, Profile ID and Encryption keys provided in your Sandbox Project.
- The password for the client private key is available in client-pgp-keys.info file in your downloaded encryption keys zip file.
Smart Sandbox URL: https://sandbox.corporate-api.hsbc.com/{version}/{trade-finace api endpoint}
Getting Started
- Any input data, such as invoices, are stored in the database and are reflected in the balances of the account being used. The data persists during your testing and can be used over multiple days.
- Requires message encryption, Digital Signature (JSON Web Token signed with Client credentials) and base64 encoding so reflects our production API journey. Please use the PGP keys provided in your Sandbox project as we have configured your access to use these credentials.
- The password for the client private key is available in client-pgp-keys.info file in your downloaded encryption keys zip file.
- The sandbox supports both positive and negative test scenarios that reflect our production system behaviour. Refer to the Response Codes and Formats Page and examples under API Endpoint Specifications.
- We provide sandbox management APIs that will allow you to add more data or reset your sandbox back to the base data set.
Generating Credentials via Dev Hub
Following are the credentials that can be obtained via Dev Hub. It is essential for performing smart sandbox testing.
| Identifiers | Description |
|---|---|
| HSBC Profile ID | Use this as your Digital Identity |
| Client Secret | Use this only for the Data Management APIs. |
| Organization ID | Use this only for the Data Management APIs. |
| hsbc-public.key | Encryption Key that HSBC Shared to you. |
| client-private.key | Signing Key that HSBC obtained from you. |
| client-public.key | Encryption Key that HSBC obtained from you. |
Let's try getting these credentials for your testing.
- Step 1 - Create/ View Dev hub Project
-
Please set up your Dev Hub project that would generate credentials needed to connect to the smart sandbox. Refer to Sandbox Project - User Guide.
- Step 2 - Obtain credentials from Dev Hub
-
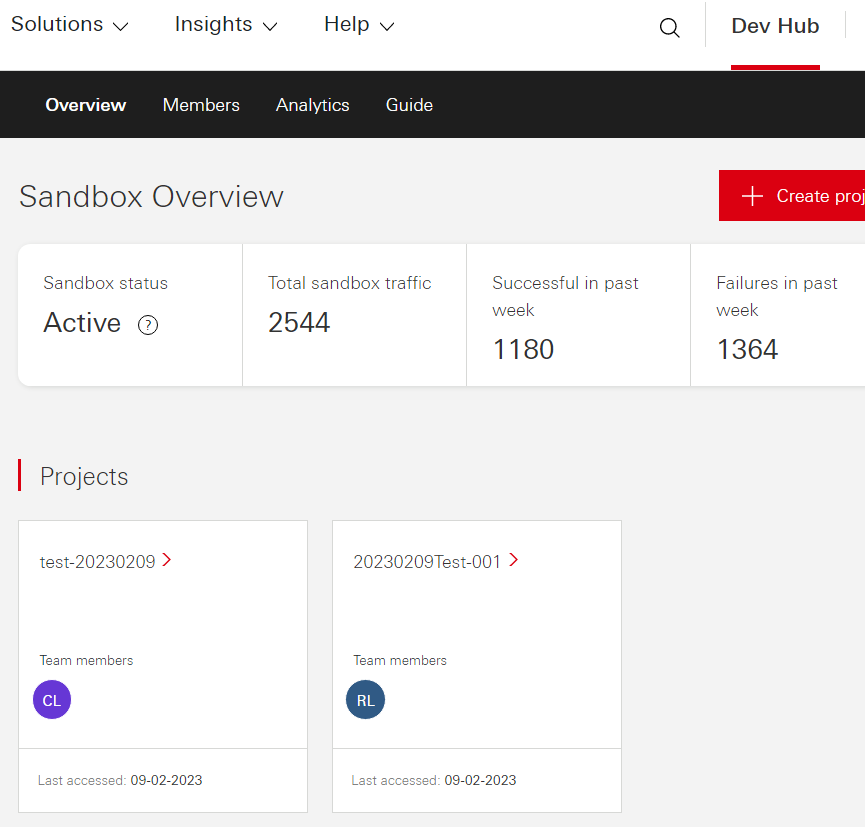
Once you have set up your Dev Hub Project, select it from the project list.
- Step 3 - View project dashboard and credentials
-
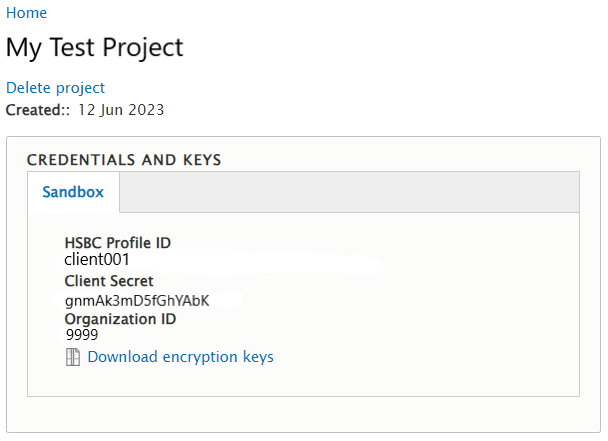
Upon the project dashboard is displayed, please note the credentials generated for your testing under CREDENTIALS AND KEYS:
Category Items Example Description Overview Sandbox Project Name My Test Project Project Name you defined during project creation. Created Date 12 Jun 2023 Date of project creation. CREDENTIALS AND KEYS HSBC Profile ID client001 Use this as your Digital Identity representing your API Connection to HSBC, required in Digital Signature per Client Facing API Request. Client Secret gmmAk3mD5fGhYabK Use this only for the Data Management APIs. Organization ID 9999 Use this only for the Data Management APIs. Download encryption keys My Test Project.zip A zip package contained required PGP Keys for sending Authenticated Request, Response and Message Level Encryptions.
Files within the encryption keys package:Files Description {{your-dev-hub-project-name}}.zip A Zip Package named according to your project, which includes the keys required for en/ decryptions and Digital Signature. Click Download encryption keys and save it to your computer. hsbc-public.key Use the HSBC Public Key to encrypt the request sent to the Smart Sandbox. client-private.key Use the Client Private key to sign the JSON Web Token that needs to be sent as part of the header (Authorization) per Smart Sandbox Request, and decrypt the response received. client-public.key The Smart Sandbox use this key to encrypt the response message before sending, this file is included for reference purpose only. client-pgp-keys.info This file contains the default passphrase for the key files.
Next, Let's try making a smart sandbox API request via Sample Java Client
Making a Smart Sandbox API Request
To send a request to the Smart Sandbox, it is required to setup your client services to perform the following, in addition to the request header and payload that you sent in mock sandbox:
| Elements | Description |
|---|---|
| Request Header | It is required to provide the Digital Signature (JSON Web Token which contains your HSBC Profile ID and your encrypted request payload) under Authorization in the request header, which is used for the sandbox to Authenticate your request. |
| Request Body |
It is required to encrypt your JSON request body with the Bank Public key provided in the encryption Key Package and Base64 encodes it. |
| Response | It is required to decodes the Base64 String response from sandbox, and then decrypt it with the client-private-key attached in the downloaded Encryption Keys package |
Let's try making an API Request via sample java client with valid authentication, encrypting and decrypting the messages.
Testing API Connectivity
- Step 1 - Configure Sample JAVA Client
-
- Download the Trade Finance sample java client.
- JDK: 1.8
- Maven 3
- Import
trade-finance-sample-code.zipas your maven project. - Set under
src\main\resources\projects.json{ "projects": [ { "name": "Project Name", //The name must be the same as the folder name where you store your keys "clientProfileId": "EvVM4uo3T53Oody0QAl22xie1CueuHnS", //Input Client's HSBC API Profile "oboProfileId": "PC000006001", //Customer Identifier from your platform, Optional, only used for B2B2B integration. "clientSecret": "pU7MG5qt6YStBHuC", //Only used for sandbox, obtained from Dev Hub Project on develop.hsbc "organizationId": "24", //Only used for sandbox, obtained from Dev Hub Project on develop.hsbc "pgpKeys": { "fileNames": { "bankPublic": "hsbc-public.key", //Input the name of bank public key given "clientPublic": "client-public.key", //Input the name of client public key you generated (If you are using sandbox, use the key sandbox generated for your) "clientPrivate": "client-private.key" //Input the name of client private key you generated (If you are using sandbox, use the key sandbox generated for your) }, "clientPrivateKeyPassphrase": "1password" //Input the passPhrase of client private key }, "xHsbcCryptoSignature": true, //Input true if you are using API Version > 3 "targetHost": "SANDBOX", //Input the environment you would like to connect to. Values are "SANDBOX", "UAT", "PRODUCTION" "clientHostingRegion": "SG", //Input your Hosting Region "active": true //You can add multiple projects, hence this is the flag to choose which project you are using } ] } - Set under src\main\config\ClientConfig.java:
/** * JSON Web Token */ public static final SignatureAlgorithm TOKEN_ALG = SignatureAlgorithm.PS256; public static final String TOKEN_AUD = "HSBC.MKT"; // Keep this for Audience is Trade Finance public static final String TOKEN_PAYLOAD_HASH_ALG = "SHA-256"; //Your Request Payload Hashing Algorithm - Create a folder with your desired project name, place the keys downloaded form Dev Hub Project: under:
src\main\resources\keys\{project name}- client private key:
client-private.asc - client public key:
client-public.asc - hsbc public key:
hsbc-public.asc
- client private key:
- Download the Trade Finance sample java client.
- Step 2 - Testing API Connectivity
-
To test API Connectivity, let's try this API - PointOfSaleFinance$V1$EnquireInvoiceStatusSummary - which help corporates to submit invoices from your buyer/ seller to HSBC.
In this scenario, since there isn't any invoices submitted yet, we will expect no data are found.- Run PointOfSaleFinance$V1$EnquireInvoiceStatusSummary under
src\main\java\api\wsit\product_request\


- From the terminal, observe the API Journey:
- It reads the
ListInvoices.jsonundersrc\main\resources\trade-finance\point-of-sale-financeand convert into a JSON String


- The JSON String will be encrypted and base64encoded as the request payload
- Finally, a JSON Web Token will be generated as your digital signature and included in the header of your request.


- It reads the
- Observe #6 Decrypting Response Message
- If you get a decrypted response message in JSON in #6.1, congratulations! You have your Authentication setup correct and successfully connected to the HSBC API!
- The API response shows that no data found as expected.

- To change the request content, update
ListInvoices.jsonundersrc\main\resources\trade-finance\point-of-sale-financeand repeat step 1.


Congratulation! You have managed the connectivity to HSBC API.
For API usage for specific products and endpoints, please refer to Making an API Request/ Sandbox Access under Documentation for the respective APIs.
- Run PointOfSaleFinance$V1$EnquireInvoiceStatusSummary under
Next, Let's try making an API Request via postman
Making an API Request via postman
- Step 1 - Access/ Download Postman Collections
-
Please download the file, unzip the content and load to your local instance of Postman.
Trade Finance API Sandbox.postman_collection.zip
- Step 2 - Import Postman Collections
-
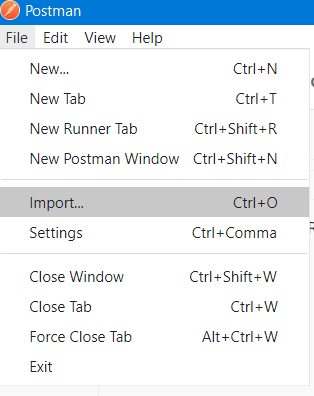
- Click File -> Import
- Click Upload File
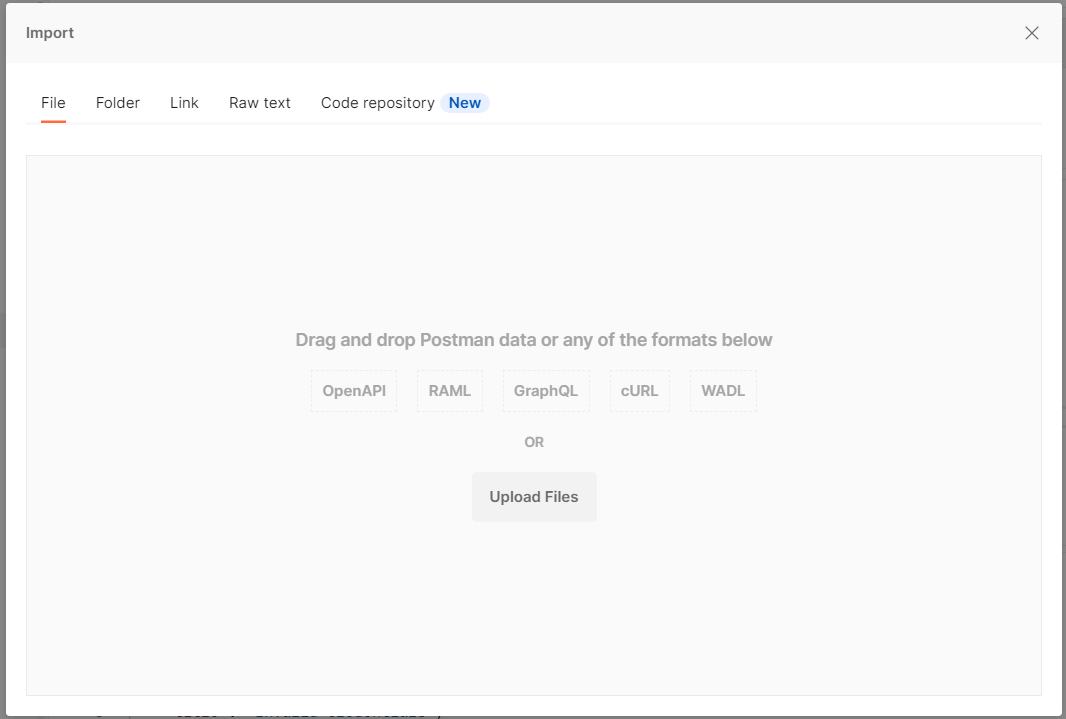
- Select trade-finance.postman_collections.json
- Confirm the collections selected, click Import
- Select develop.hsbc.sandbox.postman_environment.json and import the environment.
- Click File -> Import
- Step 3 - Select API Endpoint
-
Once Imported, select under Trade Finance collection ->
{{Product Folder}}/{API Endpoint}}you want to test. - Step 4 - Prepare Plain Request Body
-
- Prepare plain request body as per the API Endpoint Specification. Here is an example:
{ "pageSize": "2", "pageNumber": "1", "extnlCustomerId": "CUSTOMER_HK001", "ultimateDebtorIdentifier": "KYB_BHK001", "fileId": "", "endToEndIdentification": "", "requestedExecutionDate": "", "invoiceNumber": "" } - Input the above in your maven project under
src\main\resources\trade-finance\common\requestContent.json.
- Prepare plain request body as per the API Endpoint Specification. Here is an example:
- Step 5 - Generate Encrypted Request Body and Digital Signature
-
- Generate your encrypted Request Body as Base64 encoded String and hence generate JSON Web Token by running
src\main\java\api\wsit\request_helper\EncryptAndGenerateAuthToken.javain the maven project. - View console for the generated:
- Signed JSON Web Token (encoded strings which start with a token prefix JWS)
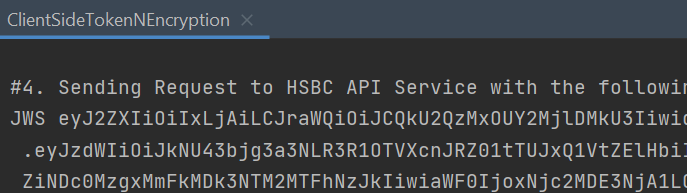
- Encrypted request body (Base64 Encoded String):

- Signed JSON Web Token (encoded strings which start with a token prefix JWS)
- Generate your encrypted Request Body as Base64 encoded String and hence generate JSON Web Token by running
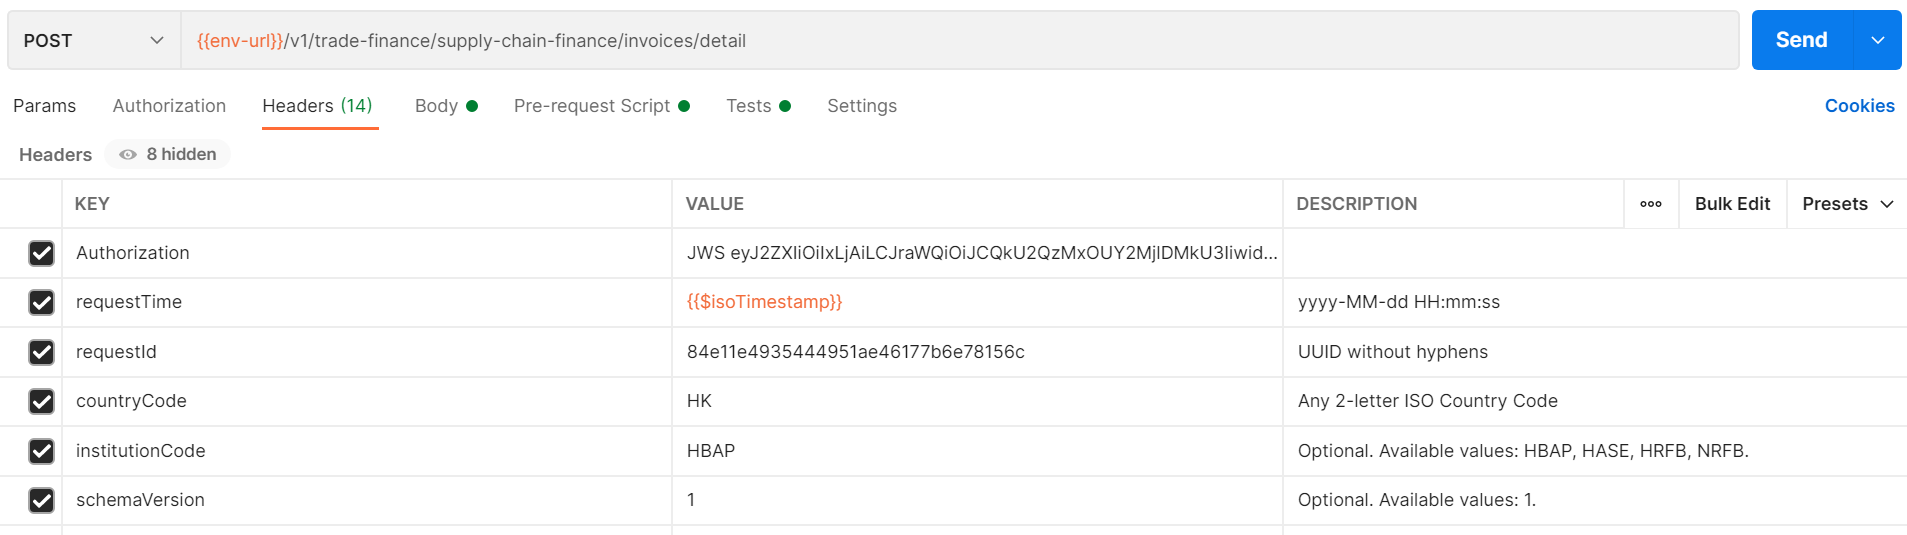
- Step 6 - Prepare Request Headers in Postman
-
Prepare your request header as per the corresponding API Endpoint Specification. Input the Signed JSON Web Token in the Authorization header obtained in Testing API Connectivity step 2.
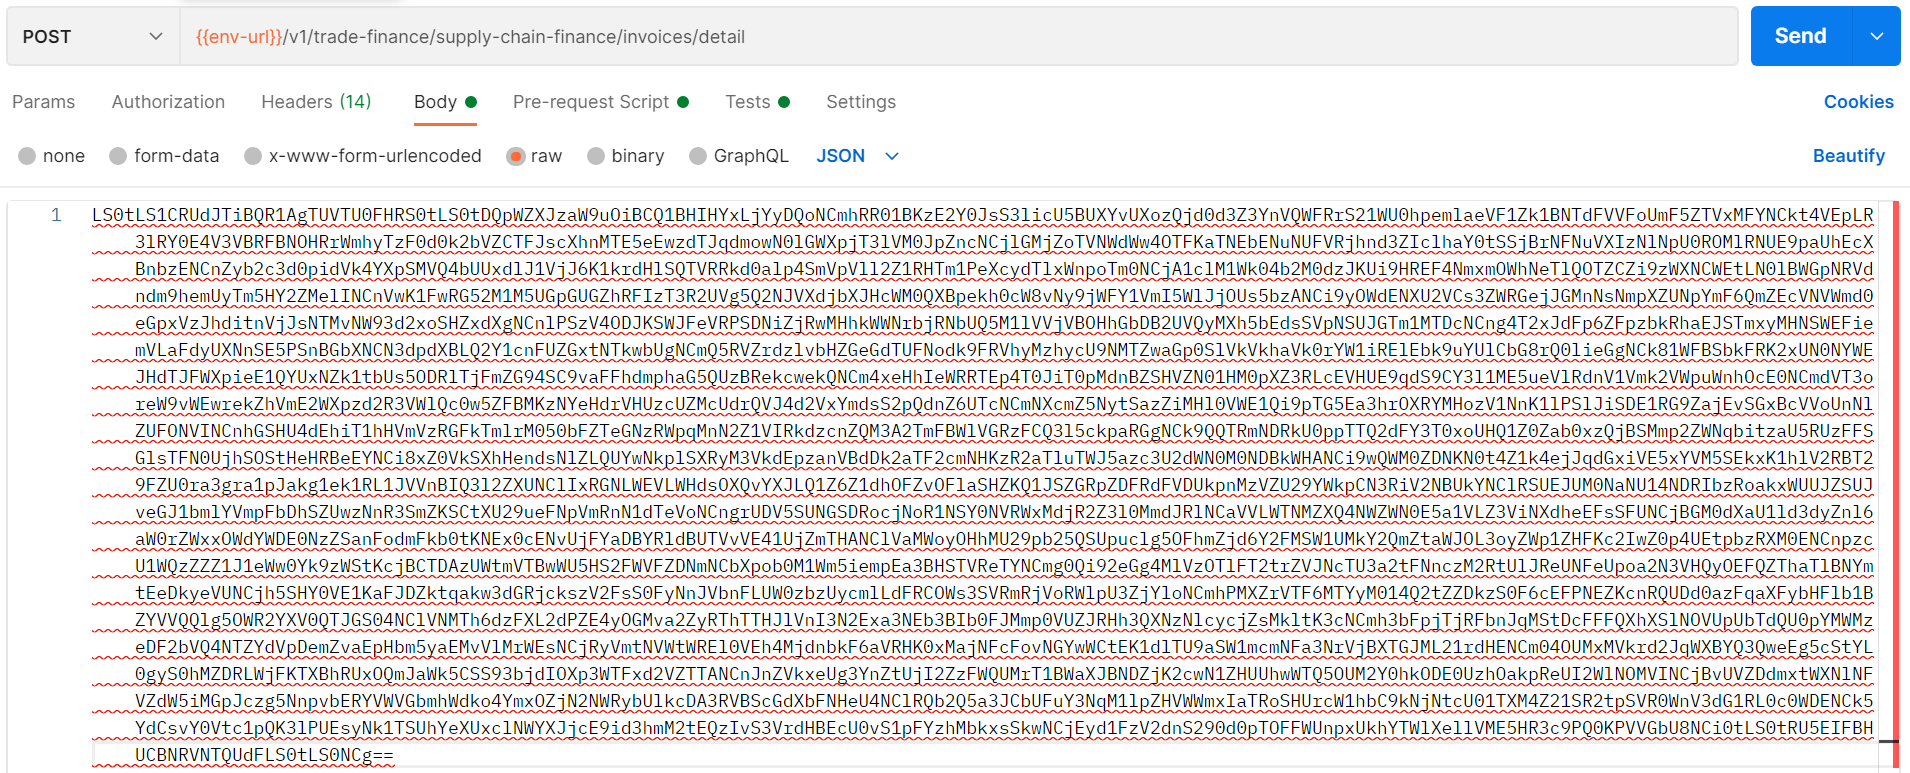
- Step 7 - Prepare Request Body in Postman
-
Click Body on the tab menu under Endpoint. Input the Encrypted Request Body obtained from Testing API Connectivity step 2.
- Step 8 - Execute API Request
-
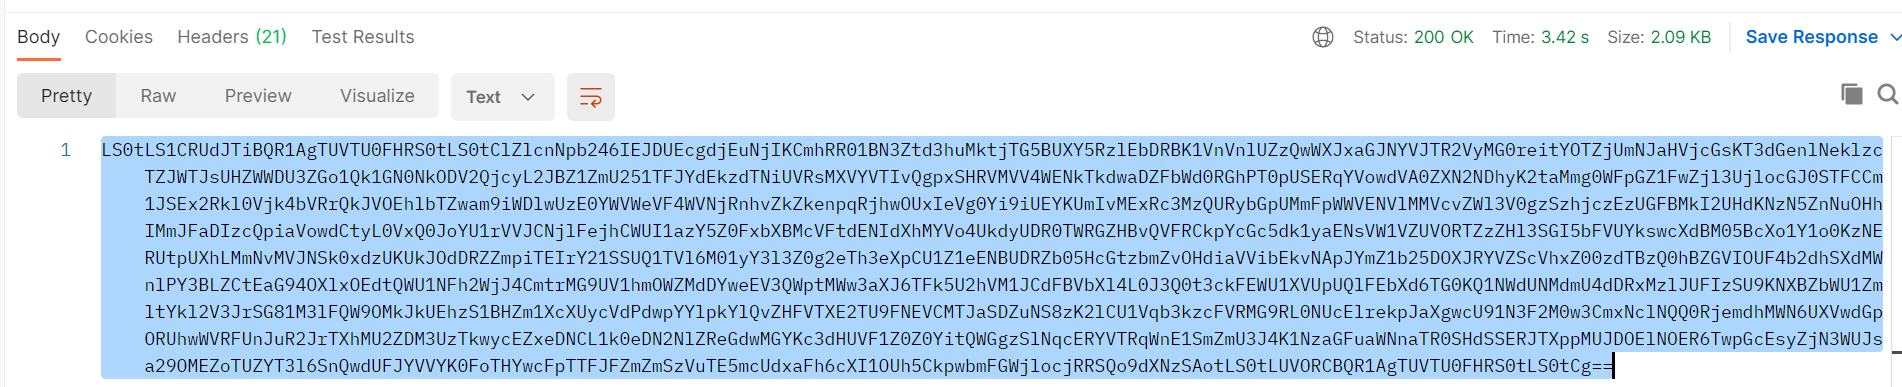
Click Send and the request will be sent to the smart sandbox.
- Step 9 - Process API Response
-
- Upon successful request, the http status code and the encrypted response (in Base64) will be displayed.
- Select and copy the response String for next step.
- Step 10 - Decode and decrypt the response
-
- Go back to your maven project, select and open
src\main\resources\request-json-file\wsit\SampleResponseMessage.json. - Paste the encrypted string obtained from last step.
- Select and Run
src\main\java\api\wsit\request_helper\ProcessResponseMessage.java
- Go back to your maven project, select and open
- Step 11 - View decrypted response message
-
View the decrypted response from the maven project console.
Related articles